Manage Entity - Entity Overview
Use the functionality to view the complete 360 view of a customer or entity and manage the details. The feature is applicable to all bank users who are assigned the required permissions to manage entities.
On the dashboard, from the list of requests, click any link under Borrower. Alternatively, from the list of tasks or on the facility overview screen, click any borrower/entity name to manage the entity details.

The application displays the entity overview screen with the following details:
Left pane menu
The menu items on the left pane and the corresponding details on the right pane. Click any menu item on the left pane to view the corresponding details on the right pane.
If the user directly navigates to the Entity Overview, the below sections display on the left pane.

If the user navigates to the Entity Overview through Application (Request Overview, Product Overview, Drawing Overview), then the customer action section displays.
Task sticky footer
The task sticky footer is displayed on the bottom of the screen. Applicable only if navigated to this screen from the tasks list screen.
Assigned Relationship Manager: Click the icon to view the relationship manager contact card - email, address, phone, and bank branch.

General
The application displays the following menu items under the General menu on the left pane. By default, the entity overview details are displayed on the right pane.

Entity Overview
The application displays the entity related information. Click to view the information based on the entity type - Individual.
Individual Entity or Applicant
Individual Entity Details


The application displays the following information:
- General Information: Entity ID, Entity Type (Individual), Status(Prospect/Active), First Name, Middle Name, and Last Name of the applicant, Full Registration Name of applicant, Gender, National ID Number which is the SSN, Date of Birth, ID Type, ID Number, Country of Issue, State of Issue , Issue Date, Expiry Date, Email, Phone, MIS Code, Sector, Risk Sector, Language,Currency ,Branch and Profit Center. Few information are picked from the back-end system, for instance, the bank branch and profit center are mapped with the relationship manager of the entity.
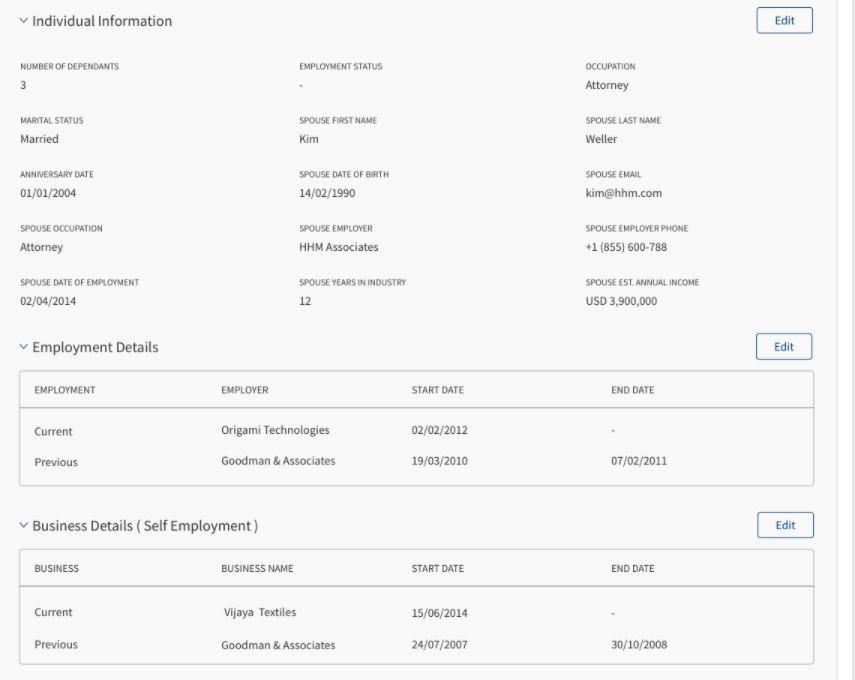
- Individual Information: This section is an accordion, in the collapsed state by default and expands only when the user wants to view the individual information.
- Number of Dependents, Employment Status, Occupation, Marital Status.
- Employment Details : The Employment Details section displays the following details - Employment (Current and Previous), Employer, Start Date, End Date, Employer Address and Employer Phone number.
- Business Details(Self Employment): The Business Details section displays the following details - Business(Current and Previous), Business Name, Start Date, End Date.
- Financial Information: The section is an accordion, in the collapsed state by default and expands only when the user wants to view the financial information.
- Date and Currency details
- Assets and Income: Total Assets, Estimated Annual Income, Gross Monthly Salary, Net Monthly Salary, and Other Monthly Income (Source of other Monthly Income and Other Monthly Income).
- Liabilities and Expenses: Total Liabilities, Total Debt, Total Monthly Debt Servicing Amount, and Total Monthly Household Expenses, DTI Ratio(Total Monthly Debt Servicing Amount + Total Monthly Household Expenses)/ Total Net Monthly Income) of each Party.
Edit Entity
Click the Edit button to modify the entity details.
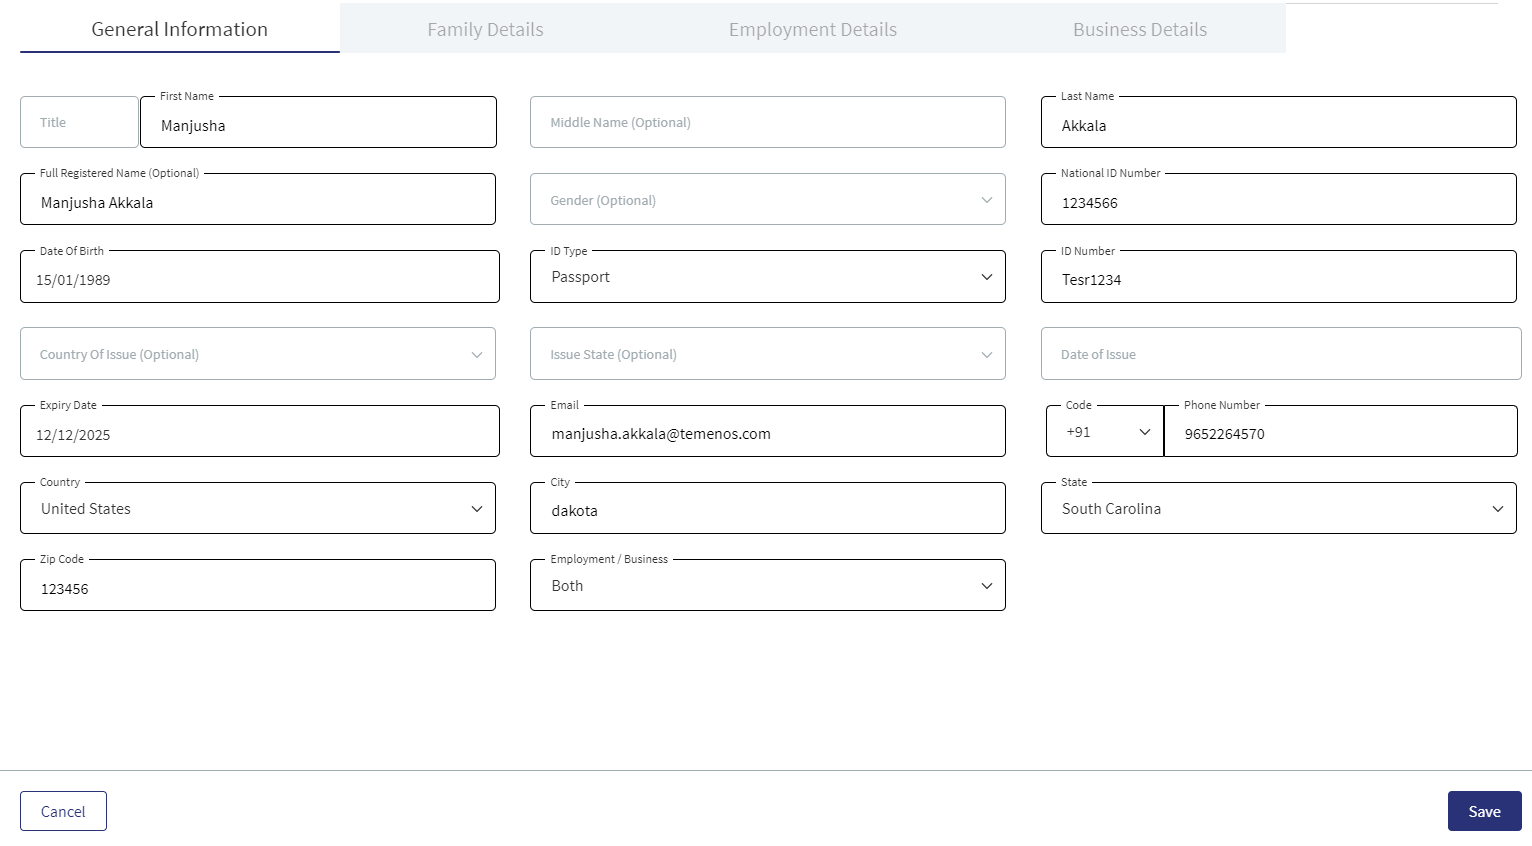
The application displays the following on the General Information tab:
- Entity ID, Entity Type, Status, First name, Middle name, Last Name and Full Registered Name, These fields cannot be modified.
- By default, the MIS Code and Sector fields are assigned with Others option. If the value for these fields are not available from Party MS (ODMS in case of retail and SME), the fields are mapped to the value- others (code-9000) and the fields are editable.
Follow these steps:
- Click the Edit button to modify the entity details. Make the changes as required on the General Information, Individual Information, Employment Details, Business Details and Financial Information tabs.
- The following fields are mandatory and cannot be left blank: Full Registered Name, Date of Birth, Phone Number, National ID.
- Click Update to save the details.
- The application displays a confirmation message that the record is updated successfully.
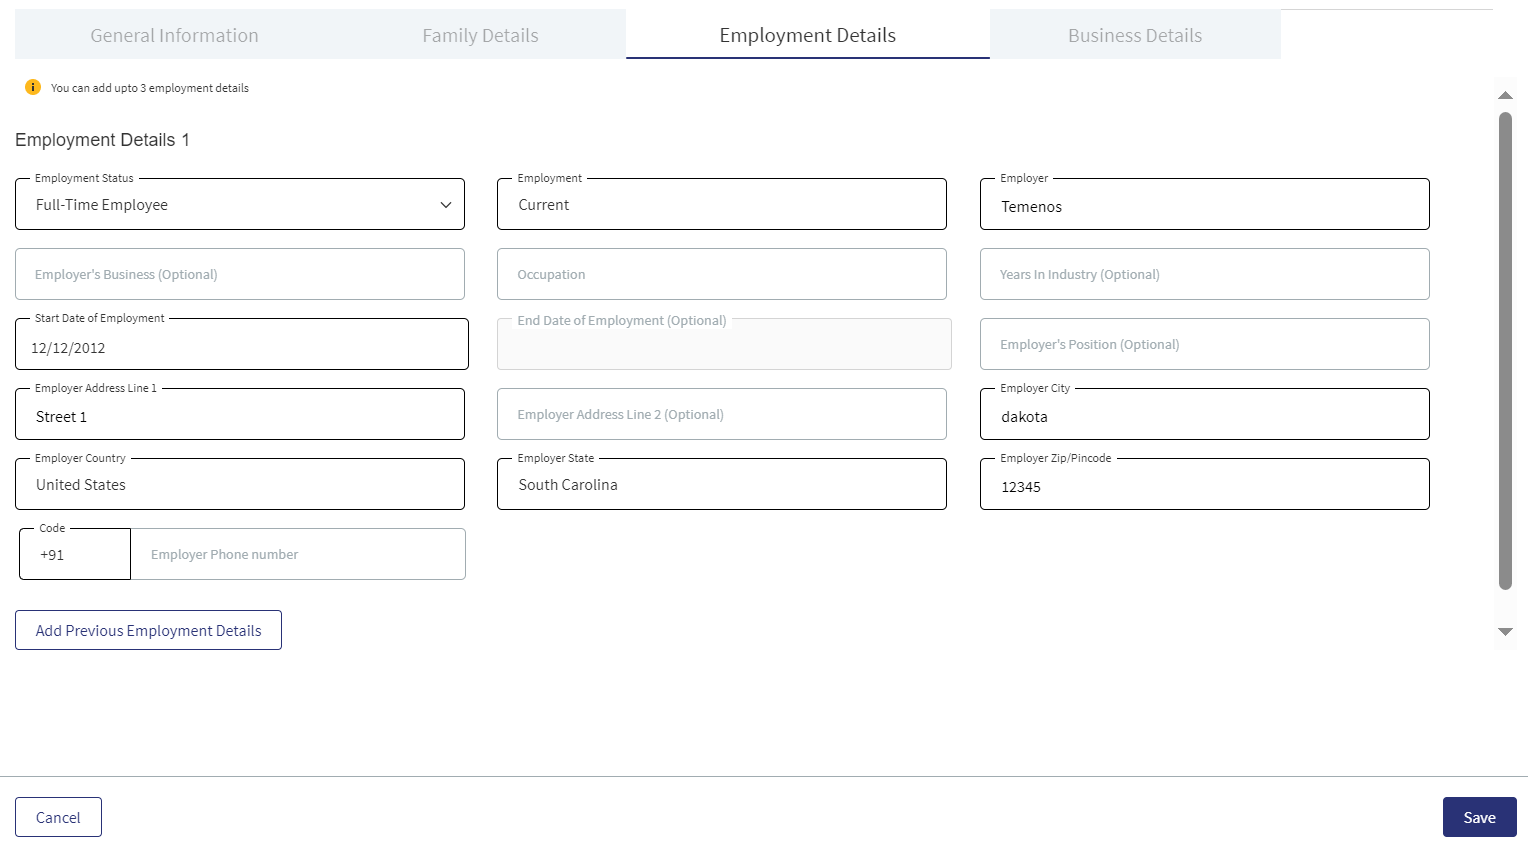
Employment Details: The Employment Details section displays the following details - Employment (Current and Previous), Employer, Start Date, End Date.
The following fields are editable in this section.
- Employment - Current/Previous- If current is selected, End Date is disabled.
- Employer
- Employment Start Date
- Employment End Date
- Employer’s Business (Optional Field)
- Employer’s Position (Optional Field)
- Address
- Employer Address Line1
- Employer Address Line2 (optional)
- Employer State
- Employer City
- Employer Country
- Employer ZIP/Pin code
- Employer Phone Number (Optional Field)
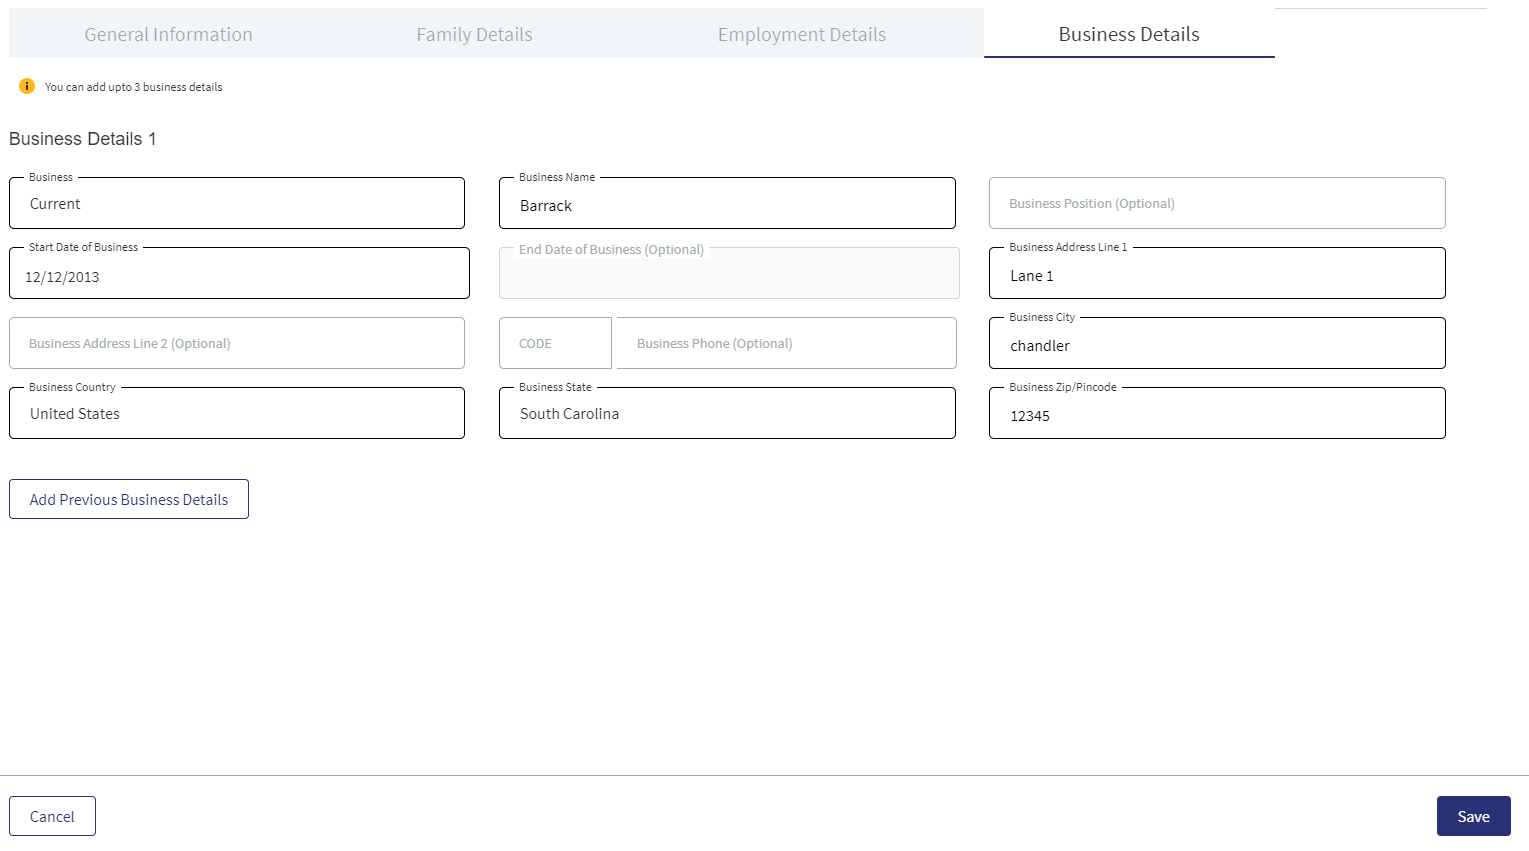
Business Details(Self Employment): The Business Details section displays the following details - Business(Current and Previous), Business Name,Start Date, End Date.
The following fields are editable in this section.
- Business- Current/Previous - If current is selected, End Date is disabled.
- Business Name
- Business Start Date
- Business End Date
- Business Name
- Business Type (Employer’s Business) (Optional Field)
- Business Position (Optional Field)
- Address
- Business Address Line1
- Business Address Line2
- Business State
- Business City
- Business Country
- Business ZIP/Pin code
- Business Phone Number (Optional Field)
Click Cancel to discard the changes. On the confirmation pop-up that appears, click Yes. The changes are not saved.
Addresses

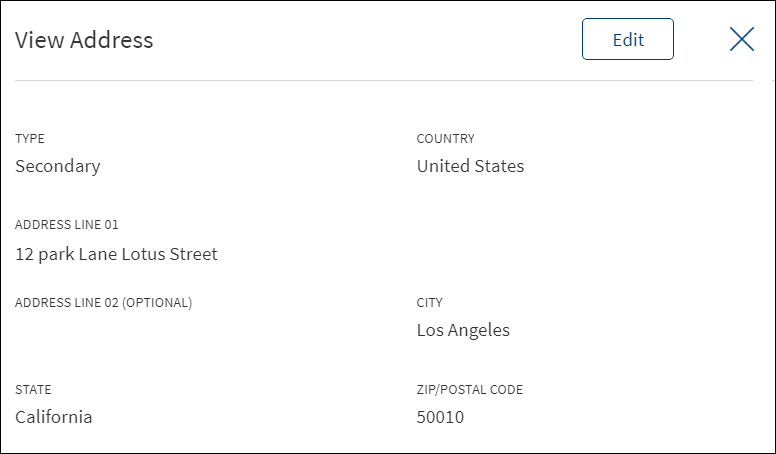
The application displays the addresses of the entity with the following details: Address Type, Address, City, State, and Postal Code. For individual, the address can be home, office, and other.The address added by a customer in the Origination (Self Service) application under the company address is mapped as Primary address type.
Do any of the following:
- Click Add Address to add a new address.
- Use the context menu as required.
- Click Edit to modify the details. Not applicable if it is a group address.
- Click Delete to remove the record. In the confirmation pop-up that appears, click Yes. The record is removed.
- Click the row to view the details.
- Click Edit to modify the details. Not applicable if it is a group address
- Click X to close the form.
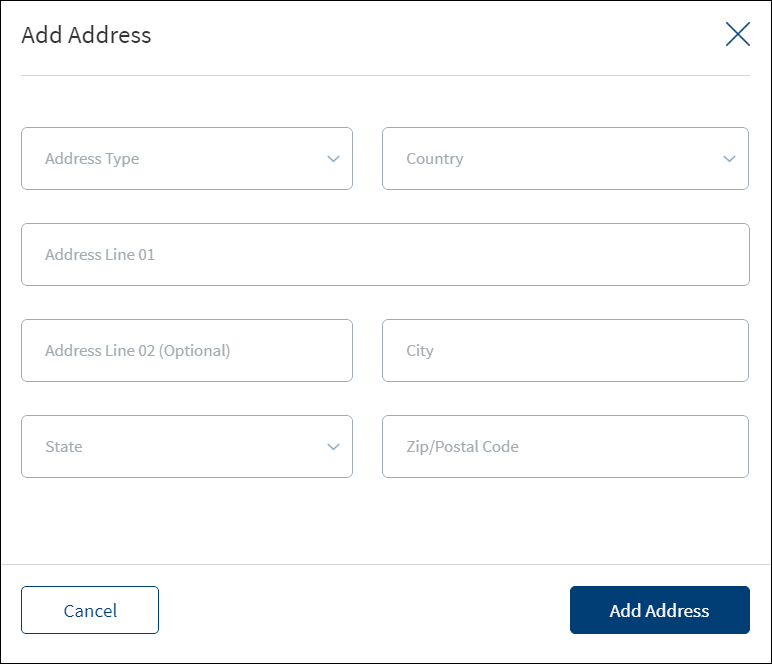
- Fill the details.
- Click Add Address. The application displays a confirmation message that the address is added successfully.
- The address is added to the list.
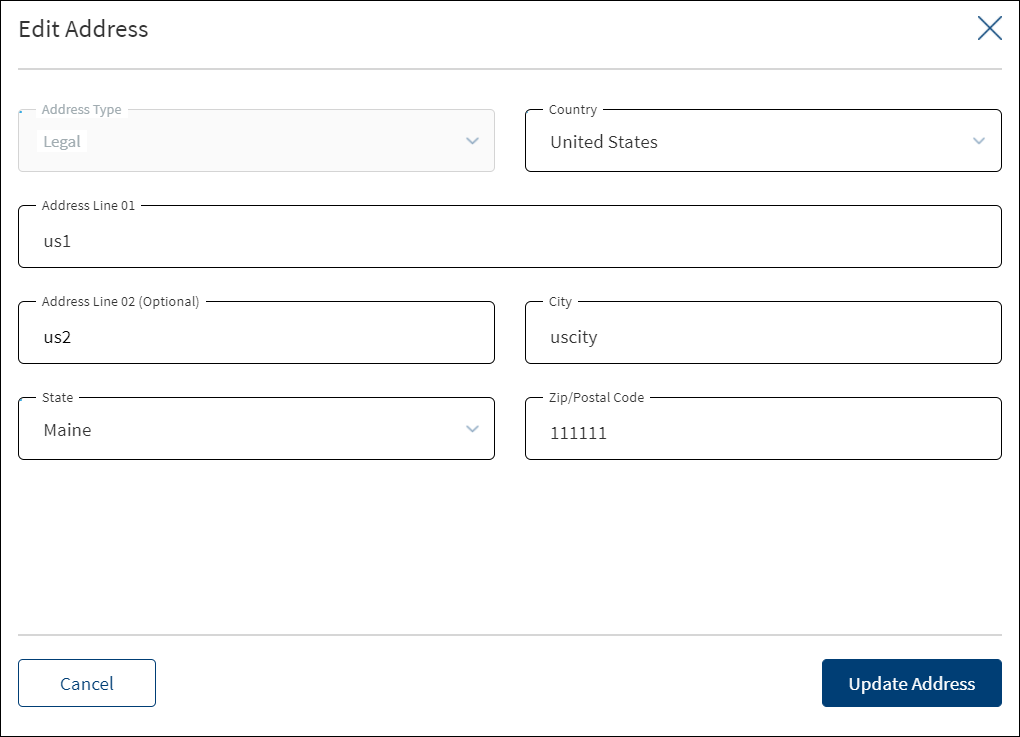
- Make the changes as required.
- The following details can be edited: Country, Address Line, City, State, and Zip/Postal Code.
- Click Update Address to save the details.
- The application displays a confirmation message that the address is updated successfully.
Click Cancel to discard the changes. On the confirmation pop-up that appears, click Yes. The changes are not saved.
Collateral

The application displays the list of collateral owned by the entity with the following details: Collateral ID,Collateral Name, Estimated Value, Facilities and Loan To Value (LTV). The Collateral details can be viewed from the Request and Facility Overview under General Section. Add/Edit/View Collateral Details can be done from Main Applicant’s Entity Overview screen.
The addition or removal of collateral in the Assist (Entity Overview) is permission-based and currently, no user has been granted this permission.The Collateral can be added either by the customer during data entry or through RM-assisted processes.
Add Collateral
Until otherwise stated, information in all the fields are mandatory.
- The application displays the list of collateral of the related parties with the following details:Collateral ID,Collateral Name, Estimated Value, Facilities and Loan To Value (LTV). Otherwise, the list will be empty. The collateral list is retrieved from Transact.
- Add any from the existing list. Use the search bar to search for a specific collateral.
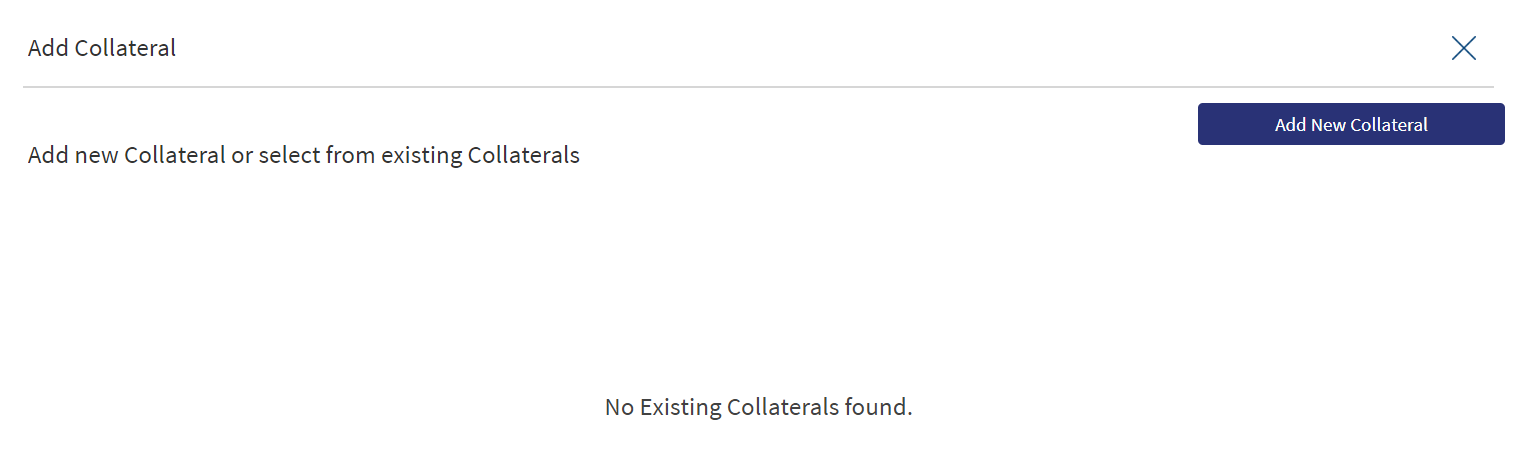
- Alternatively, click Add New Collateral.
- Add any from the existing list. Use the search bar to search for a specific collateral.
- In the Add New Collateral screen that appears, enter the Collateral Name.
- Select the Collateral Type from the list (for example - Real Estate).
- Select the Collateral Sub-Type from the list.
- Select the currency from the list (for example, USD). This field has predictive search where you can enter your option in the box and select the required option from the matching result rather than scroll down the list to select a currency.
- Enter the collateral Estimated Value.
- The application displays the list of facilities applicable to the request. Select the facility to apply for the collateral. You can apply the collateral to one, many, or all the facilities under the request.
- Click Add Collateral.
- Do any of the following:
- Click the row to view the details.
- On the context menu,
- Click Edit to modify the details.
- Only the linked facilities are editable for collateral received from Transact/core banking system.
- All the fields and linked facilities are editable for collateral created during onboarding process.
- Atleast one facility must be linked to a collateral.
- Click Delete to remove the record. On the confirmation pop-up that appears, click Yes to delete the record.
- Click Edit to modify the details.
When the Collateral details are not updated by the customer in Origination App, then Bank user clicks Add Collateral button from the Entity Overview of main applicant only to update the Collateral details.
In the collateral section of the Entity Overview screen, when the user adds new collateral, the Facilities section tags the collateral to the pending Facilities related to the entity.
- When the user adds collateral details, the Facilities is selected from the Facilities section.
- The Facilities section displays all the pending Facilities related to the Entity.
- The Facilities section in the collateral displays the following details:
- Facility ID
- Facility Name
- Facility Type
- Once the collateral is linked to a facility, it displays in the respective Request and Facility Overview.
- The Facilities section is not mandatory, the user can chose to add collateral without selecting any facility in the Facilities section.
The Collateral screen consists of the below components, Most of the details are updated with the inputs from the Origination App.
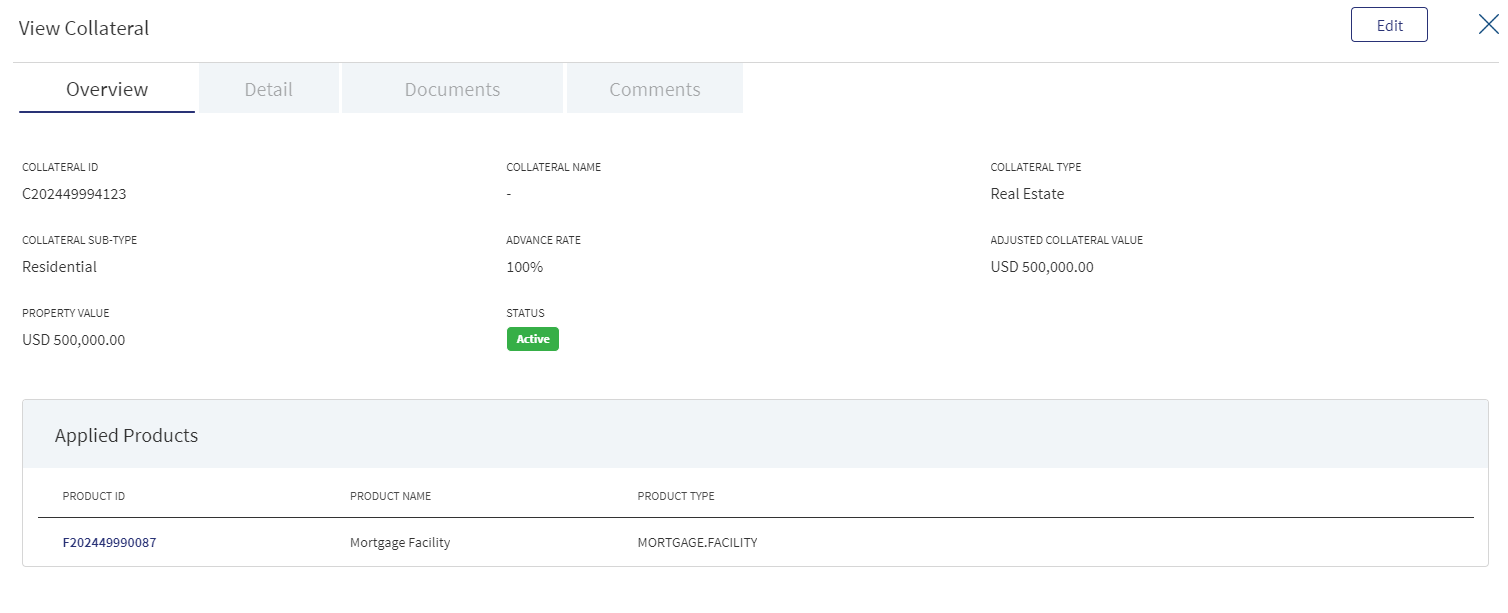
Overview: The Overview Section consists of the below and is mapped to the respective fields from the Origination App.

- Collateral Name - Optional Field to capture the Collateral Name.
- Collateral Type - Collateral Type default value is "Real Estate".
- Collateral sub type - Collateral Sub Type default value is "Residential".
- Advance Rate - This is a percentage field which accepts the numerical Value (it is non-editable in all the overview screens of post submission).It is configured in Spotlight and the default value is pre-configured as 90%.
- Adjusted Collateral Value - This is the accepted mortgage amount calculated based on the % entered in Advance Rate field.
- Property Cost - Market Value of the Property, this field is updated from the Origination App.
- Status - The Status Indicates if the collateral is linked to any facility or not, incase it is linked it shows as active and if it is not linked it shows as inactive.For mortgages as the collateral is created from Temenos Digital it is Inactive.
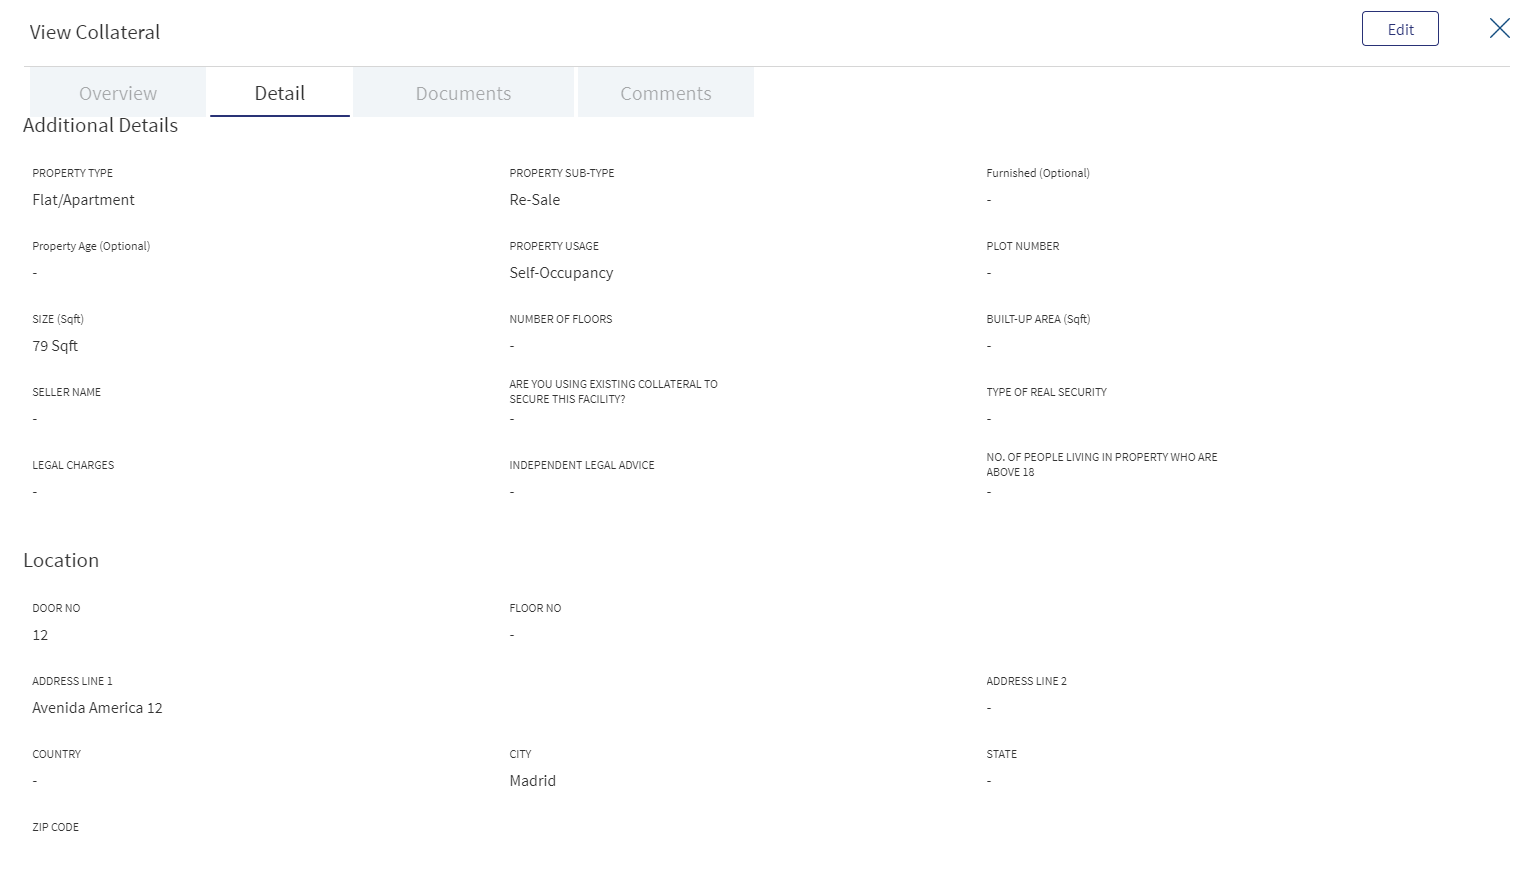
Details: This section displays the details of the collateral. It consists of the below and is mapped to the respective fields from the Origination App.

- Property Type - This is a dropdown field with Value "Individual House", "Flat/Apartment", "Row House", "Bungalow", "Pent house". It is a Mandatory Field, and is prepopulated from the Origination App.
- Property Sub Type - This is a dropdown field with Values, "Re-Sale”, “New”. It is a Mandatory Field, and is prepopulated from the Origination App.
- Furnished - This is a dropdown field with Values “Fully furnished”, “Partially Furnished”, “Not Furnished”. It is a Mandatory Field, and is prepopulated from the Origination App.
- Property Age - This is a date Picker Field. It is a Mandatory Field, and is prepopulated from the Origination App.
- Property Status - This is a dropdown field with Values “Re-Sale”, “New”. It is a Mandatory Field, and is prepopulated from the Origination App.
- Construction Completion Date - This is a date Picker Field. It is a Mandatory Field, and is prepopulated from the Origination App.
- Expected Construction Completion Date - This is a date Picker Field. It is a Mandatory Field, and is prepopulated from the Origination App.
- Property Usage - This is a dropdown field with Values, "Self-Occupancy", "Investment". It is a Mandatory Field, and is prepopulated from the Origination App.
- Plot Number - This is an alphanumeric field.
- Size(Sqft) - This is a numeric field accepting values with size in Sqft.
- No Of Floors - This is a numeric field.
- Built-up Area(Sqft) - This is a numeric field accepting values with size in Sqft.
- Seller Name - Name of the property Seller.
- Are you using existing collateral to secure this facility? - Radio Button/Auto Populate
- Type of Real security
- Legal charge
- Independent Legal Advice
- Number of people living in the property who are above 18
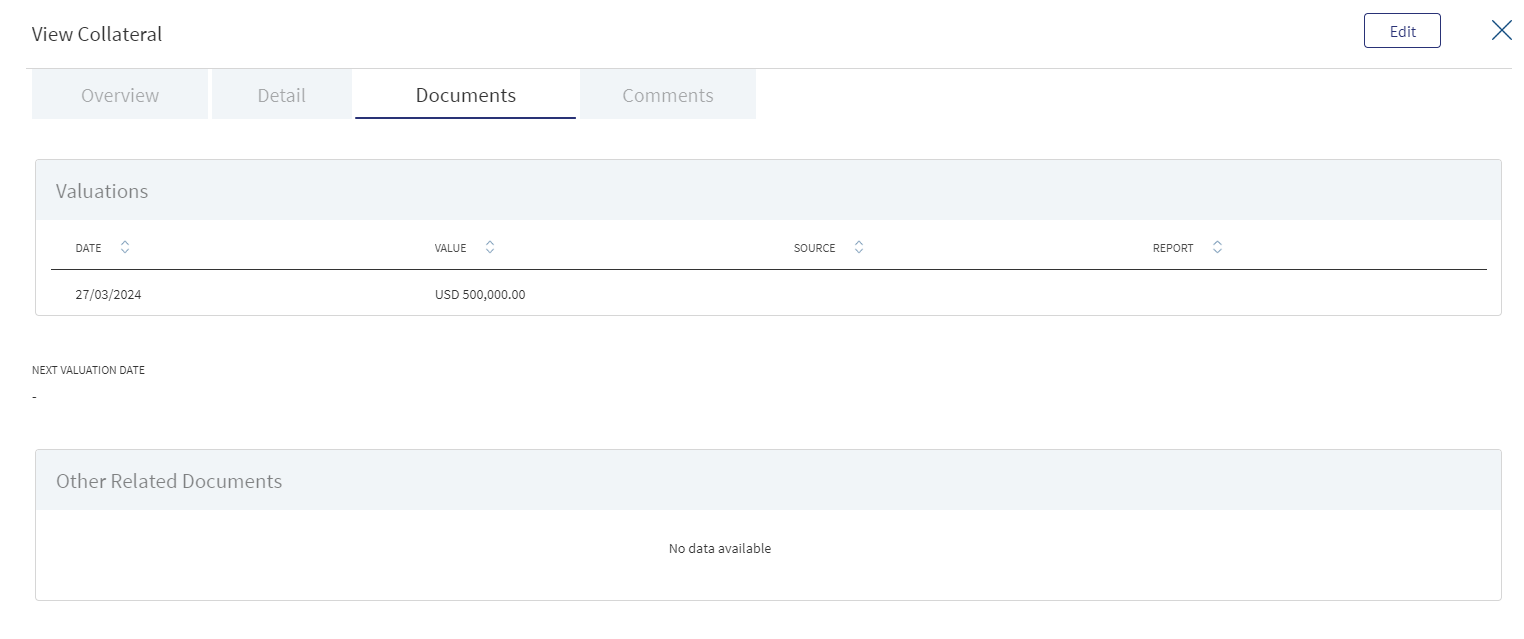
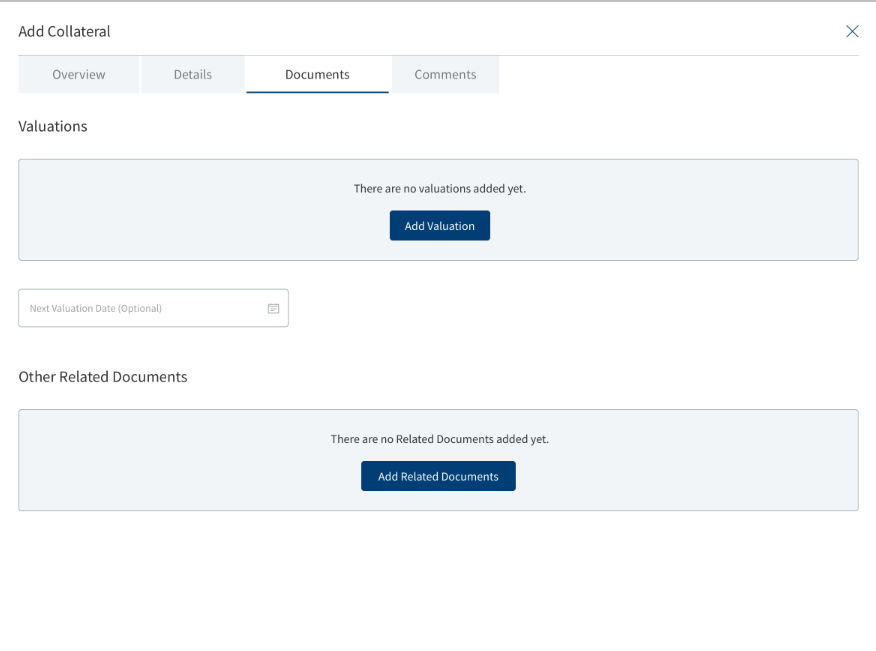
Document :In this section the Valuation related documents and the documents in the Due diligence Documents section is added. It also has an option to Add Next Valuation Date for the Collateral.

- Valuations
- Date - System Date updated by the system.
- Value
- Source - Field to update the source
- Report
- Other Related Documents
- Add Related Documents
The valuation amount field automatically populates with the property value in the collateral screen post-submission.The changes in the valuation amount field during post-submission triggers an automatic recalculation of the maximum eligible amount and LTV.
The system validates if the requested loan amount adheres to the maximum eligible amount and the LTV conforms to the configured threshold.
The formula is : Adjusted Collateral = Property Value * (Advance Rate/100).
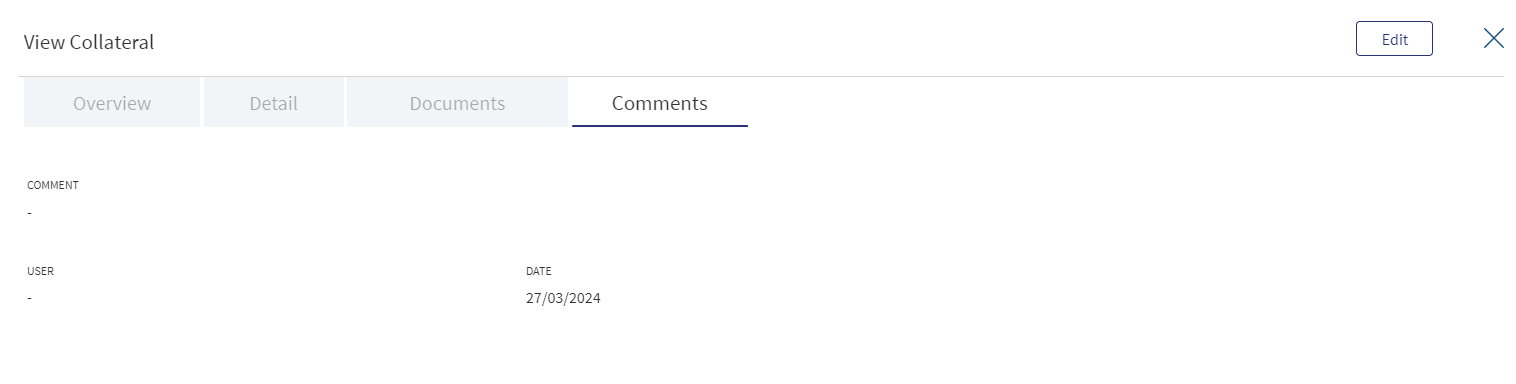
Comments:This section displays the comments updated for the Collateral along with the name by whom it is updated and the date when it is added.

When the Application is submitted, all the collateral related details are updated and stored in the Temenos Digital Assist in LOSMS.
Once the save button is clicked, the system detects modifications in the fields like collateral value, valuation amount, or requested loan amount within the entry object.If any changes are detected, the system automatically initiates a recalculation process for the calculations associated with the credit component and updates the new updated values.
When the collateral data moves from client App to Temenos Digital Assist, Collateral is already linked to parent Facility for which it was captured.
View Collateral: In the collateral section of the Entity Overview screen, the user can view both the collateral details and the Facilities section.
Click Add Collateral to add a collateral to the entity.
Edit Collateral: In the collateral section of the Entity Overview screen, the user can Edit both the collateral details and the Facilities section.
- Make the changes as required.
- Only the facilities that are linked to the collateral can be edited.
All the other fields can be edited only from Entity Overview screen.
- In Valuation, all the fields can be edited. Delete the existing valuations if multiple valuations are available for a collateral, however, at least one valuation should exist.
- The facilities linked to the entity are not editable.
- Click Update Collateral to save the details.
- The application displays a confirmation message that the collateral is updated successfully.
Click Cancel to discard the changes. On the confirmation pop-up that appears, click Yes. The changes are not saved.
Bank User must be able to amend the existing Collateral details even if the Collateral details are already provided by the customer in Origination App. Bank User must be able to amend from the main applicant’s entity overview. Once the Bank user amends the collateral details, the user must be able to Save/Update the details amended. Bank User clicks the Edit button to amend the Collateral details from the Entity Overview.
- The Facilities section displays all the pending Facilities related to the Entity.
- When there is change in the Facilities section, the same reflects in the Request and Facility Overview.
- Click Edit to modify the details or click X to close the form.
- All the fields of valuation can be edited. Delete a valuation record.
- Add or edit is not applicable for an existing collateral received from Transact/core banking system.
- Facilities linked to the entity are not editable. Delete the existing valuations if multiple valuations are present for a collateral, however at least one valuation should exist. You cannot delete all the valuation records.
- The accordion view displays the details of all the Facilities added to the collateral in the Entity Overview screen. The Facilities column has sub rows, the Title row has details of all the other columns.
Delete Collateral: User can delete the collateral from the Entity Overview.
- The user can delete collateral using the contextual menu.
- The User cannot delete the collateral received from the Core banking System in Temenos Digital.
- When a user tries to Delete the collateral received from the Core banking System, a message prompts stating “The selected collateral is a collateral created in Core banking, please delete the collateral in core banking system”.
- When the user tries to Delete the collateral created in Temenos Digital that is linked to Facilities, a message prompts stating “The selected collateral has Facilities linked to it, please delink the Facilities to delete the collateral”.
- When the user tries to Delete the collateral created in Temenos Digital that is not linked to Facilities, a message prompts asking if they really want to delete the collateral, when clicked “Yes” the collateral gets deleted from the entity overview, when clicked “No” the operation gets aborted.
- A new collateral or existing collateral can be added from the Entity Overview screen.
- The system allows the user to save information independently on each tab, providing flexibility in updating the collateral components.
- In the Documents section, the insurance fields such as Insurance policy number, Insurance contract type, additional insured, and so on appears only if the field “Is Insurance required” is selected as “Yes”.
- Collateral can be added in entity overview but linking of collateral is not allowed in Entity Overview screen.
- Add multiple valuations to the collateral in the valuation section. Different valuation for the same date cannot be added.
- The latest value is considered for the calculation of adjusted value.
Narratives

The application displays the list of narrative or comments entered with the following details: Category, Narratives, User name, Facilities, and Date of narration. The Narrative line item applied to an entity record is displayed in the summary and not in facility or request overview.
Do any of the following:
- Click Add Narrative to add a narrative.
- Use the context menu as required:
- Click Edit to modify the details.
- Click Delete to remove the record. In the confirmation pop-up that appears, click Yes. The record is removed. On deleting the narrative, the attached documents are also deleted.
- View details: Click any row to view the narrative details.
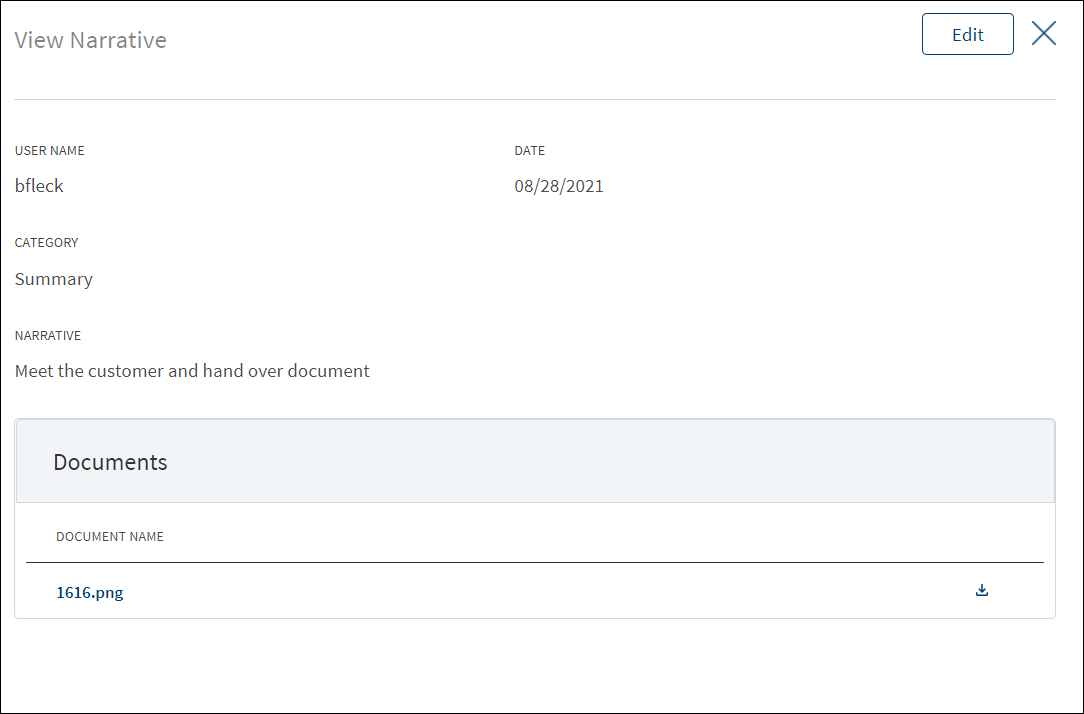
- Click Edit to modify the details or click X to close the form.
- Click the Document Name to view and download the document.

- Click Add Narrative to add a narrative.
- The application displays the signed-in user's user name and date of narration.
- Select the Category from the list (for example, Summary, Financial, Guarantor).
- Enter Narrative description. When a lengthy comment or description is entered which does not fit the field, then the content moves to the next line of the field. The field accepts up to 1000 characters.
- Click Upload Document to upload files to a narrative. A confirmation pop-up appears with maximum size and file name conditions. Click Okay to browse and upload the file. The uploaded document appears. This field is optional.
- Click the bin icon displayed beside each uploaded file to delete the file before adding a narrative.
- The document name can be alphanumeric and cannot contain spaces, and the maximum file size can be up to 25 MB.
- The following document types can be uploaded: jpeg, pdf, jpg, png, txt, doc.
- Click Add Narrative. The application displays a confirmation message that the narrative is added successfully. The narrative is added to the list. The narrative is displayed only on entity overview.
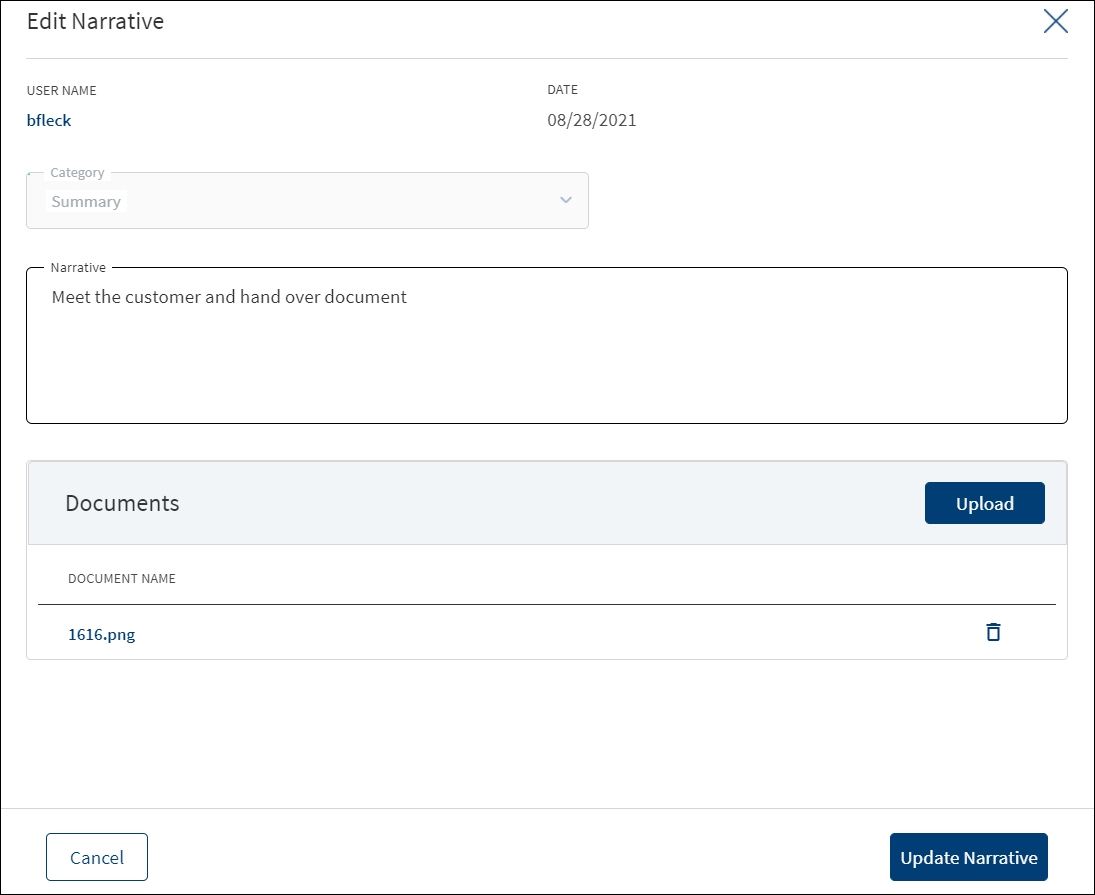
- Make the changes as required.
- A user who added the narrative can modify the following details. Other user can only view the details.
- Narrative text and Facilities in case of entity related narrative.
- Narrative text in case of facility related narrative.
- Click Download to download the existing files. If there are no existing files, click Upload to upload new files. On clicking Update, the uploaded files are successfully saved and updated in the summary screen. Upload the documents at once before updating the narrative.
- Click Update Narrative to save the details.
- The application displays a confirmation message that the narrative is updated successfully. The records that are updated at Facility Overview reflects at Request Overview and Entity Overview. Similarly, the records updated at Request Overview or Entity Overview reflects at Facility Overview.
Click Cancel to discard the changes. On the confirmation pop-up that appears, click Yes. The changes are not saved.
Documents
The application displays the list of documents associated with a request, entity, facility, or a collateral. All documents uploaded in front-end Origination as part of the overdraft or loan lending application are visible in the documents list. The Documents can be added to both new and modification facility in the Request Overview Documents section. The documents can be of evidence and financial proof of identity and address, balance sheet, cash flow statement among others. The Documents displayed are collected from the Evidence Management and as per the DMN rules displayed in the Entity Overview/Request Overview. Document Microservice stores the document reference and the actual file stores in downstream DMS, which by default is Formpipe Product.

This section consists of two sub-sections:
- Uploaded Documents - Documents uploaded by Customer/bank user.
- System Generated Documents - The documents generated by system.
System Generated Documents section does not display in the Entity Overview.It can be viewed only in Request Overview and Product Overview.
Uploaded Documents: This section displays the documents uploaded by the customer from the Origination app and by the Bank user. They are displayed by Document category group and this category has an accordion view, which on expanding displays the actual document along with the document type.

This section consists of the following fields:
- Document Category - Displays the document category - Proof Of Address, Proof of Incomes, Proof of ID and Collateral.
- Document Type - Displays the Document type that is uploaded - Passport, Driving license etc.
- Document Name - The File name of the submitted documents.
- Linked To - This is a new field where the bank user will find which facility the particular document is linked to. If the same document is “Linked To” more than 1 facility, all the Facilities are listed by comma separation and if more documents are linked, it displays the number of Facilities and by clicking on it we see the list of Facilities. Based on the “Linked To” field, the documents are displayed in the respective Facility overview.
- Status - Displays the status of the document in different color depending on the status - Approved, Pending, Signed, Delivered, Reviewed or Rejected. All documents uploaded in the Origination app will be in Pending status.
Upload : To upload a new document.
System Generated Documents :This section displays the documents generated by the system in Temenos Digital Assist. They are displayed by Document category group and this category has an accordion view, which on expanding displays the actual document along with the document type.
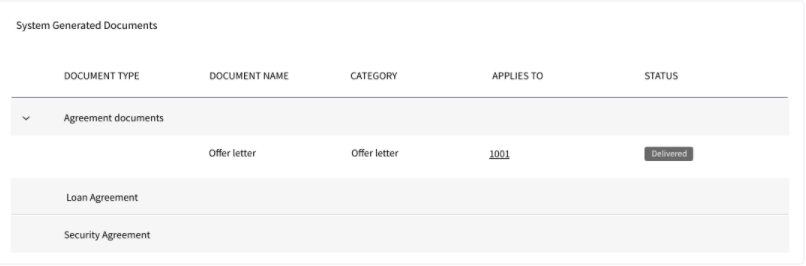
This section consists of the following fields:
- Document Type - Documents submitted before submission in the Origination app have the type as stored in Document MS. (They contain the information about type of document which has been uploaded during the origination).
- Document Name - The documents submitted before submission in the Origination app have the name File Information as given by the customer. If there is no File Information added, then the document name is added as file name.
- Document Category - Displays the document category.
- Linked To - This is a new field where the bank user will find which facility the particular document is linked to. If the same document is “Linked To” more than 1 facility, all the Facilities are listed by comma separation and if more documents are linked, it displays the number of Facilities and by clicking on it we see the list of Facilities. Based on the “Linked To” field, the documents are displayed in the respective Facility overview.
- Status - Displays the status of the document in different color depending on the status - Approved, Pending, Signed, Delivered, Reviewed or Rejected. All documents uploaded in the Origination app will be in Pending status.
Mapping between the Origination document type with Temenos Digital Assist document type.
| Document Type in Temenos Digital Origination | Document Type in Temenos Digital Assist |
|---|---|
| Entity Certification/Registration | EntityCertification |
| Tax ID Number Certification | TaxIdCertification |
| Articles of Incorporation | Article of Incorporation |
| Partnership Agreement / Declaration | PartnershipAgreement |
| Trust Agreement / Declaration | TrustAgreement |
| Article of Incorporation | ArticlesIncorporation |
| Financial Statement | FinancialStatements |
| Passport | Passport |
| Driving License | DriverLicense |
| National ID | TaxIdCertification |
Perform any of the following:
- Download Document: Click the Document Name to view and download the document if required. To download, click Download on the screen the appears.
- View Details: Click the row to view the document details. Click the ID to view the overview details. The document can be mapped to a request, entity, facility, or a collateral.
- If the document category is applied to a collateral record, then the document is displayed in the document summary under the respective Facilities where the collateral is used.
- If the document category is applied to entity record, then the document is displayed in the document summary under respective entity overview only and will not be available under request overview and facility overview.
- Click Upload to upload a new document.
- You will be able to view all the modification Facilities listed along with the new Facilities in Facilities section with the following Facility ID, Facility type, Amount, term, Decision Status
- If both the Purpose options are selected initially, both New and Modification Facilities are listed on this screen. Otherwise, only one of the Facility displays based on the selected purpose.
- Use the context menu as required. The context menu is displayed only for the documents with Pending status:
- Click Edit to modify the details. The document with Pending/Signed status only can be edited.
- Click Delete to remove the record. The document with Pending status only can be deleted. In the confirmation pop-up that appears, click Yes. The record is removed.
- On the Documents list screen, click Upload.
- A confirmation pop-up appears that the maximum file size can be up to 25 MB and the file name can be alphanumeric without any spaces. Click Yes.
- A window to upload the document is displayed.
- Select the file to upload. The file name can contain alphanumeric characters and cannot contain spaces. The document types can be PDF, TXT, JPG, PNG, and JPEG. The maximum size allowed per document is 25 MB. The application displays a error message if incorrect document type is selected. In this case, click Add New Document to continue with the document upload.
- The Add Document screen is displayed. All fields are mandatory.
- Enter the Document Name.
- Select the Category from the list. The document is attached to the selected category level.
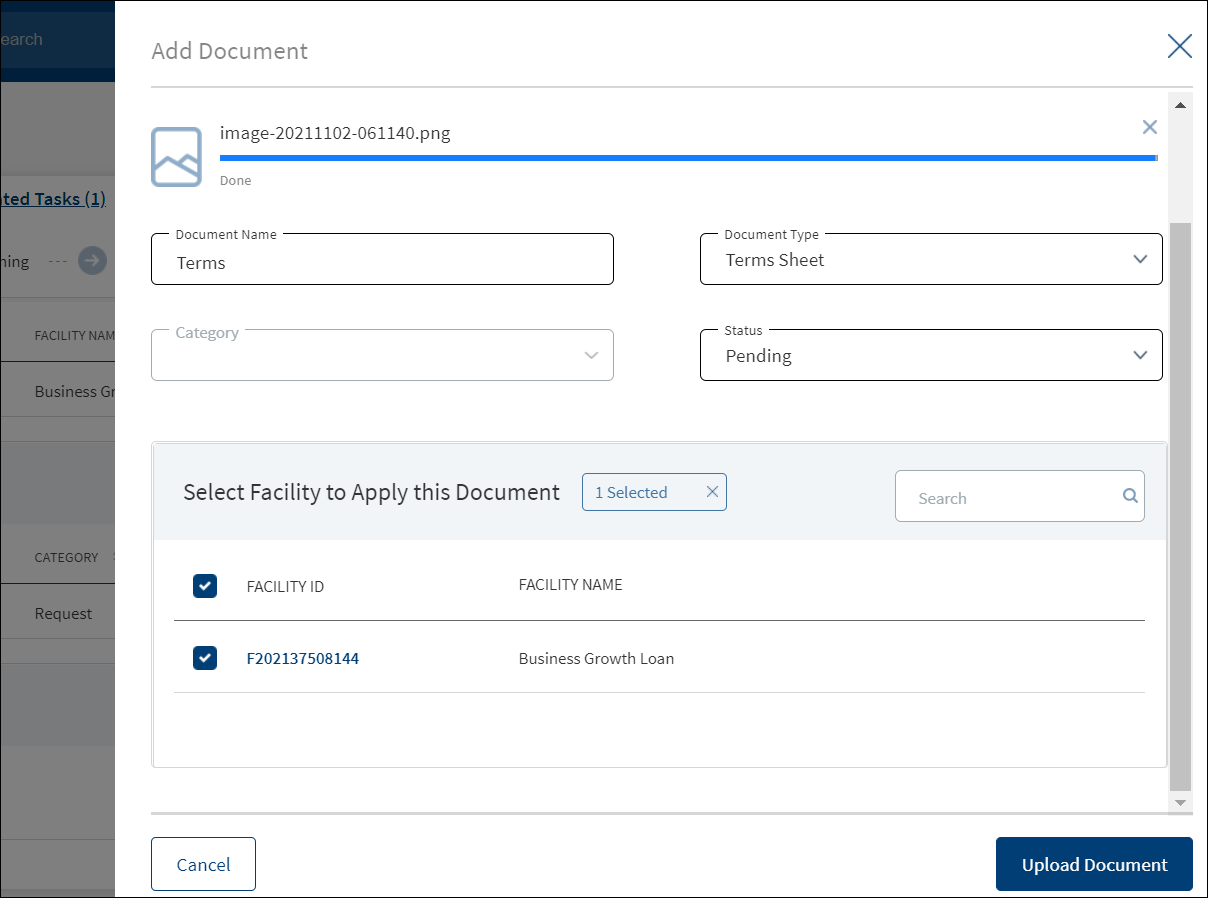
- The application displays the list depending on the selected document category. Select the category to apply to the document. The selection can be one, many, or all.
- If category is request, then the Request ID is displayed by default.
- If category is facility, this field lists all the Facilities under the request. Defaults if this list has one value.
- If category is entity, this field lists all the entities related to the request. Defaults if this list has one value.
- If category is collateral, this lists all the collateral related to the request. Defaults if this list has one value.
- Select the Status from the list - Approved, Pending, Signed, Delivered, and Reviewed.
- The Facilities field is by default the Entity Name for Entity Type of Documents and Collateral for Collateral type of Documents. The mapping between Document Type and Facilities is done in DMN.
- The Linked To field , all the active facility of the Entity is listed. User can select multiple Facilities. This is an optional field when uploaded from Entity Overview. The Documents uploaded through “Origination App”, this field is by default the Facility.
- If an entity related document is uploaded from the Origination page, it displays in Entity Overview,Request Overview, Facility Overview for the linked facility.
- If a facility related document is uploaded from the Origination page, it displays in Request Overview, Facility Overview of linked facility.
- If a collateral related document is uploaded , it displays Entity Overview of the Collateral owner, Request Overview, Facility Overview of the linked Facilities.
- Click Upload Document. The application displays a confirmation message that the document is uploaded successfully. The document is added to the documents list. If the document category is applied to entity record, then the document is displayed in the document summary under respective entity overview only.
- An Adhoc document can be uploaded from any Overview(Entity, Request, Facility).
The document with Pending and Signed status only can be edited, however we do not have documents with Signed status in Entity Overview.

- Only the document Status, Linked To can be edited.
- Select the Status from the list - Approved, Pending, Signed, Delivered, or Reviewed.
- The status : Pending and Signed are editable.
- The user can add/remove the interaction by editing the Link To.
- The option Reusable is a checkbox field (optional). It must be checked for Proof of ID (for Retail) / Proof of Business (for SME) & Proof of Address (for Retail and SME) documents uploaded through the Origination and Temenos Digital Assist apps. For all other categories of documents, this checkbox remains unchecked.
- The RM / RM Supervisor can choose to check/uncheck Reusable at any point in time. The Evidence MS checks the Expiry Date with the Application Date and the Reusable fields to check if the document is still valid for use when the Origination app queries it at the time of Document Upload. If the Reusable field is unchecked, the Evidence MS does not return the document (even if the expiry date is in the future) when the Origination App queries it at the time of Document Upload during the customer journey.
- Click Update Document to save the details.
- The application displays a confirmation message that the document details are updated successfully.
- If the Link To is Edited and if the Facility is removed then that document will not be visible in Facility Overview and Request Overview, however it will be visible in the Entity Overview.
- The Edit option for the logged in user depends on the permissions of the role.
Click Cancel to discard the changes. On the confirmation pop-up that appears, click Yes. The changes are not saved.
The documents uploaded by the Customer / bank user or generated by the system, bank user in the Document Section can be viewed by clicking the View Document option.The uploaded Adoc Documents can also be viewed in this section.

The Document Category with an accordion view displays : Document Type, Document Name, Facilities, Status.
When clicked on the documents in the row the following fields display:
- Document Category
- Document Type
- Actual Document
- Document Name
- Facilities
- Linked To
The view option for the logged in user depends on the permissions of the role. A Bank user will be able to View documents uploaded through Customer Action in the “Uploaded Document” section in Entity Overview, Request Overview and Facility Overview based on the Document Category and Type.
Expiry Date enables to track the validity period for each document uploaded through the Origination app or Temenos Digital Assist app. By default, the date field value is set to 3 months from the Application Date. When bank user edits this field, a validation is done to check if the date entered is greater than the system date. For documents uploaded through Origination App, this field will be blank. When the bank user changes the status of the document to Approved state, then Expiry Date field is a mandatory field. When the bank user uploads any document through the Temenos Digital Assist app, then Expiry Date field is a mandatory field.
The Bank user will be able to delete the uploaded /system generated documents.The Delete option is enabled only for the documents with status pending.Once the document is deleted based on the Link To, all the documents are delinked and deleted. The Delete option for the logged in user depends on the permissions of the role.
Parties
If an Entity(E) has 2 requests for Facilities F1, F2 and the Parties P1 ,P2 are added to each request, the Parties P1 and P2 display in the connected parties section.
Connected Entities

The application displays the list of related companies/parties added during loan application with the following details:
- Party Name. Click to view the entity details.
- Rating. The rating is fetched from the respective entity overview section.
- Contact person. Click to view the contact details.
- Phone Number. Primary contact phone number.
Do any of the following:
- Click the row to view the party details.

- Click the Party Name link to view the entity details.
- Contact person. Click to view the contact details.
- Click Add Party to add a related party to the entity.

- Select the required party. Use the search option to look for a specific party. Alternatively, click Add New Party to add an individual party.
- Click Add. The party is added to the connected entities list.
- On the
 context menu, click Delete to unlink the party. On the confirmation pop-up that appears, click Yes. The party is unlinked.
- User cannot delete or unlink a related party that is already used by a Request or Facility and an alert is displayed. For example, If ABC Entity is related to XYZ Entity and with this relation there is an active request, then the user cannot unlink.
- User cannot delete or unlink a related party that is already used by a Request or Facility and an alert is displayed. For example, If ABC Entity is related to XYZ Entity and with this relation there is an active request, then the user cannot unlink.
Financials
This section displays the financial information updated in the Origination screen.

We can only add or edit an existing record which is added. We cannot delete the row/record. Use cancel or the cross button on the screen to exit without saving the record.This is a limitation in the existing Customer Due Diligence (CDD) used for storing the financial information of an entity.
The Financial information consists of the below components
The user can add or amend or review in the Entity Overview screen.

This section consists of the following :
- Income Type
- Bonus
- Investment Income
- Annual Income
- Rental Income
- Commission
- Currency : The default currency configured in spotlight.
- Amount : It is an amount field to accept the amount for each Income type.
- Haircut : This is a configurable value in CDD (Customer Due-Diligence MS), for each income type the haircut percentage is configured in CDD(Customer Due-Diligence MS).
- Amount : Amount calculated by applying the haircut percentage on the Income amount.
- Source : The source details of income are captured in this field.
- Total Gross Income : Sum of all the amount.
- Total Net Income : The Tax percentage applied on the Total Income.
The Income is stored in CDD (Customer Due-Diligence MS) as updated by the customer based on the Income Period,however it displays annualized details in the Temenos Digital Assist screen.When a new Income type is added from Temenos Digital Assist it is added on annual basis, if the customer has chosen income period as monthly in origination, it is updated as monthly in the CDD(Customer Due-Diligence MS).

This section lists the following:
- Expense Type
- Committed Expenses
- Essential Expenses
- Quality of living Expenses
- Monthly Household expense
- Other committed expense
- Currency : The default currency configured in spotlight.
- Amount : It is an amount field to accept the amount for each expense type.
- Source :The source details of income are updated in this field.
- Total Expenses : Sum of the expense amount.
The Expenses received from customer in Origination is on monthly basis but in Temenos Digital Assist it should be displayed in annual basis. Any new expense added in Temenos Digital Assist (which will be in annual basis) should be converted to monthly and stored in CDD.(Customer Due-Diligence MS)

This section consists of the following :
- Asset Type
- Cash
- Main residence
- Secondary Residence
- Investment Property
- Investments
- Pension
- Chattels
- Currency : The default currency configured in spotlight.
- Amount : It is an amount field to accept the amount for each asset type.
- Haircut : This is a configurable value in CDD (Customer Due-Diligence MS), for each income type the haircut percentage is configured in CDD (Customer Due-Diligence MS).
- Amount : Amount calculated by applying the Haircut percentage on the Asset.
- Source : The source details of asset are captured in this field.
- Total Asset : Sum of the Asset amount listed after Haircut.

This section consists of the following :
- Liability Type
- Mortgage
- Personal Loan
- Vehicle Loan
- Currency : The default currency configured in spotlight.
- Amount : This field is for each liability type.
- Interest Rate : Interest rate for liability.
- Loan held with : Bank which has provided the Loan. (Only for Existing Debt)
- Term remaining : Time remaining for the Loan. (Term for New Debt).This is an editable field.
- Duration :It dynamically displays the equivalent term in years and months based on the input provided in the Remaining Time (in months) field.These values are not stored in the backend or the CDD MS.
- Stress rate : Stress rate applied on the interest of existing loan.This is a spotlight configuration and is configured for each loan.
- Stress tested amount : Stress rate applied on the outstanding loan amount.
Total Liabilities is the sum of new and existing debt. The new debt details are retrieved from the existing application and the existing debt details are received from CDD (Customer Due-Diligence MS).The Current Loan details are updated in the New Debt section, which are updated from the Facility Overview screen.
Add Financials:
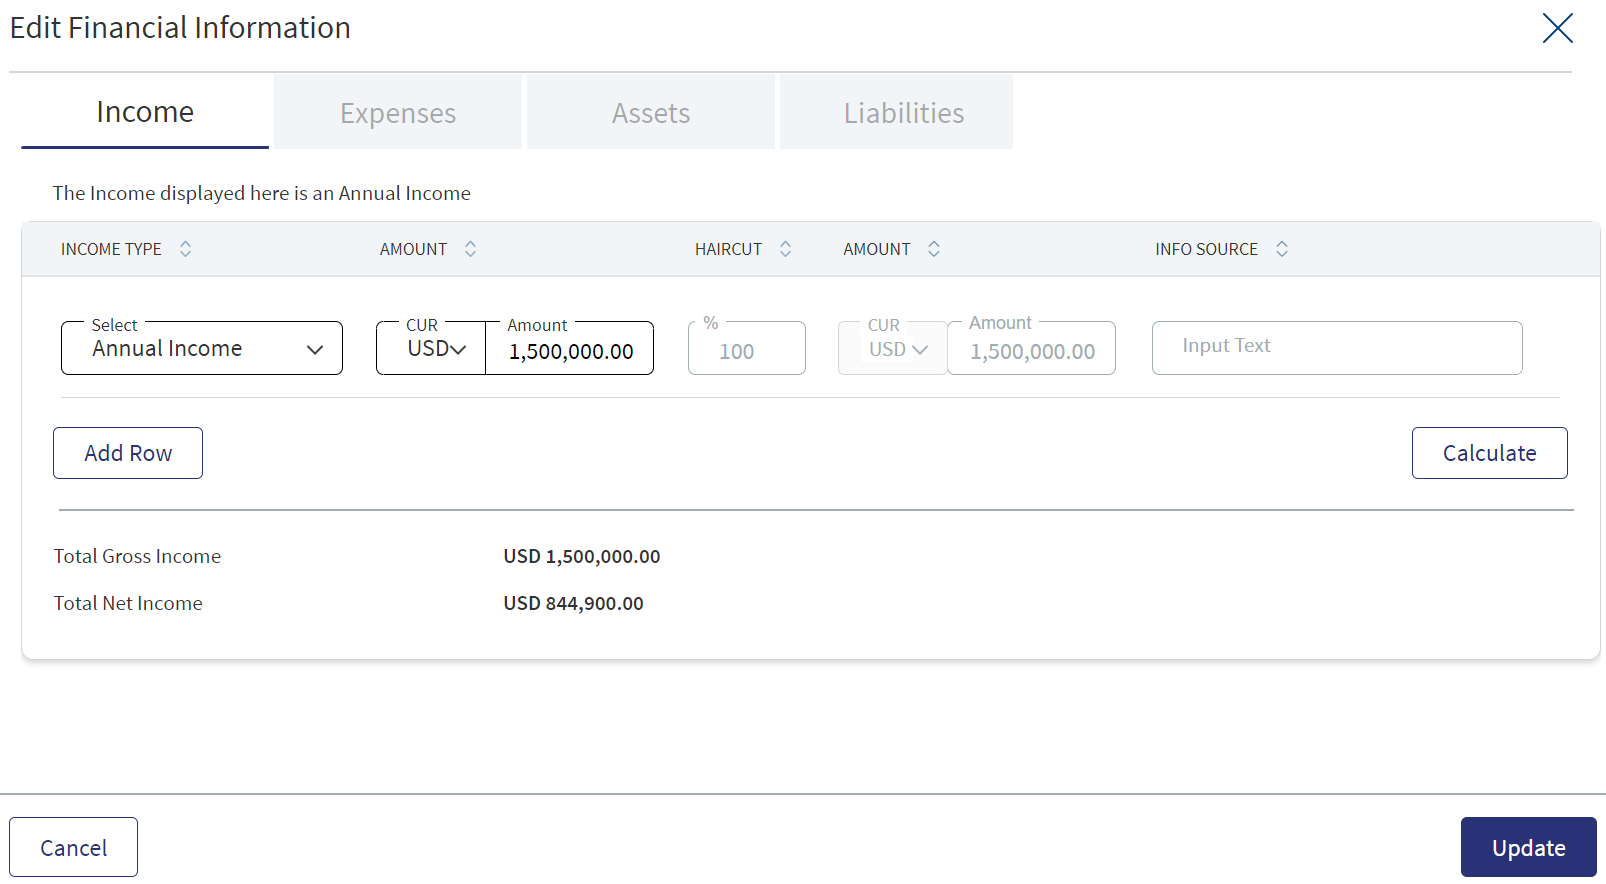
Clicking edit navigates to the add financial information screen,the details are added by clicking the add row button.
- Using the edit option, the RM can add income, expense, asset and liability as required.
- Clicking the Calculate button calculates the entered values and displays the total amount in the Total Gross Income and Total Net Income.
- Enter the required details and click Update.
- Click Cancel to discard the changes.
The Tax slabs are configured in the Spotlight.When the gross income is updated in the Temenos Digital Assist,the gross income is validated with the tax slab and the correct tax percentage gets updated to calculate the Net Income.
Edit Financials:
- Click Edit on the financials screen of the Entity Overview.
- Enter or update the required details and click Update.
- Click Cancel to discard the changes.
View Financials
Clicking anywhere on the row displays View financial information screen.
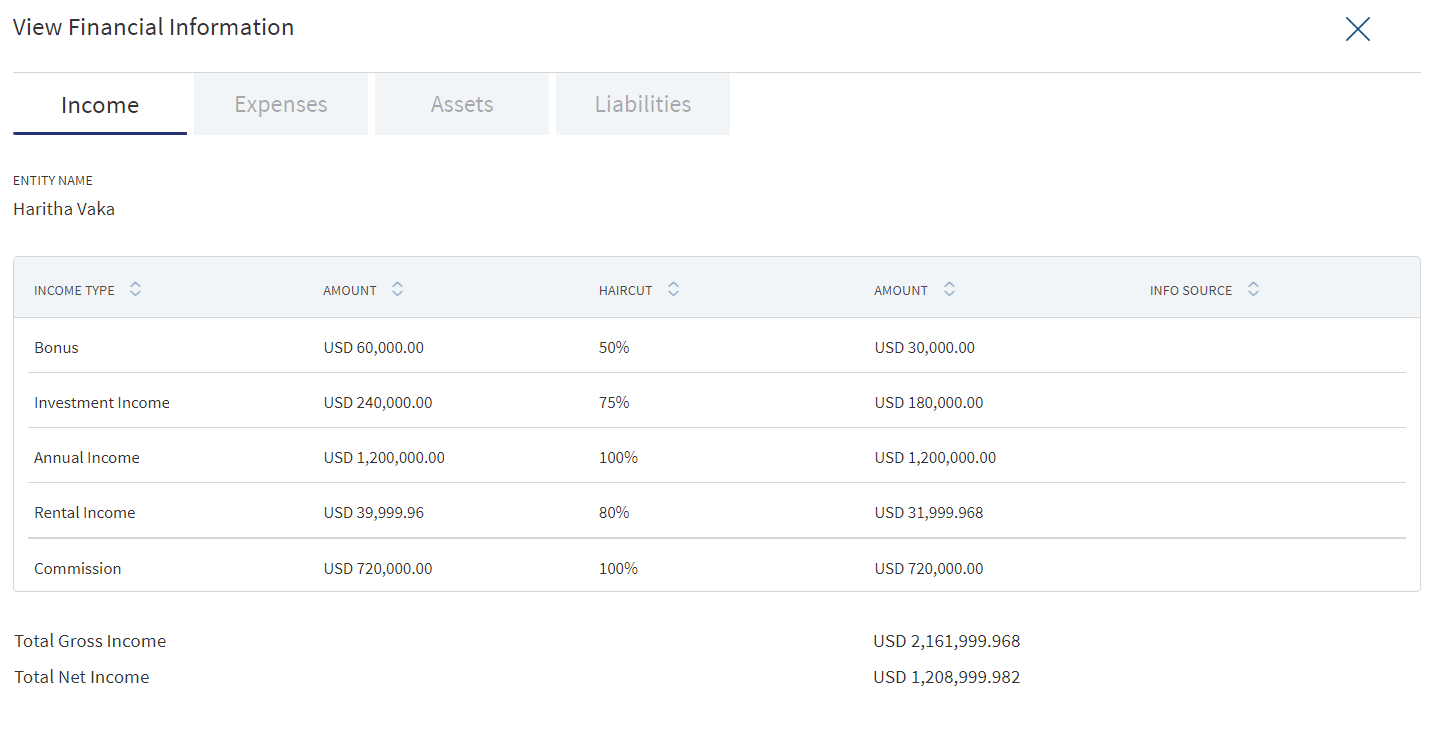
The user can review the Income, Expense, Asset and Liability details in the financial section of the Request Overview page.
Monitoring
This section covers the items that are being tracked.

Risk Ratings

The application displays the risk rating summary of all Facilities associated with the entity with the following details: Rating Type and Current Value details. The Adjustment Rating is displayed if available, otherwise New Rating is displayed.
Do any one of the following:
- Click the row to view the details and edit the risk rating details if required.
- Click Add Rating to add a new rating.
- On the context menu click Edit to modify the risk rating details:
- Select the Rating Type from the list. For example - Internal.
- The application displays the previous rating with date if the rating type was rated earlier. Otherwise, Previous Rating is displayed as N/A.
- Select the New Rating from the list.
- Select the Adjustment Rating from the list. It is an optional field.
- Enter a valid rating Date in mm/dd/yyyy format. The date must be unique. If a rating had been provided on the same date previously, the application prompts that a record with same date already exists.
- Enter a valid Next Credit Review Date in mm/dd/yyyy format. It is an optional field. The date must be greater than the rating date entered in the previous field.
- Enter the Extension Period in Months and Days in the respective boxes. It is an optional field. The value must be in numbers.
- Enter Comment if required. It is optional. When a lengthy comment or description is entered which does not fit the field, then the content moves to the next line of the field. The field accepts up to 500 characters.
- Enter View History to view the historical ratings with Rating Type, Date, and Rating details.
- Click Add Rating. The application displays a confirmation message that the rating is added successfully.
Click Cancel to discard the changes. On the confirmation pop-up that appears, click Yes. The changes are not saved.
This section gives the overview of the risk rating details. It has two sections: Risk Rating and Score Card.
Risk Rating displays the below fields:
- Name
- Rating Type
- Previous Rating
- New Rating
- Adjustment Rating
- Date
- Comment
- History - View History (clickable)
Score Card: This section displays the Total Score eligibility for the Entity. The value ranges from 0 TO 100.
It displays the below fields:
- Application Information
- Value
- Score
Do any one of the following:
- Click View History to view the historical ratings.
- Click X to close the form.
- Make the changes as required.
- The following details can be edited: New Rating, Adjustment Rating, Next Credit Review Date, Extension Period in Months and Days, and Comments.
- Click Edit Rating to save the details.
- The application displays a confirmation message that the rating is updated successfully.
Click Cancel to discard the changes. On the confirmation pop-up that appears, click Yes. The changes are not saved.
APIs
For the complete list of APIs shipped as part of this feature, see Experience APIs documentation.
In this topic